
A long time ago, in a galaxy far, far away, I found out about SSH keys and GPG keys and I thought they were good… so I started using them, obviously the wrong way (if you want to know a little bit more, you can start here and also here). I even tried to use GPG in my email and as a consequence, I spent a month sending gibberish to everybody else before I realized what was happening, because “The road to hell is paved with good intentions” -used to say grandma-.
Nowadays I use SSH to authenticate remote connections (mainly to GitHub, and with some servers too) and GPG to sign Git commits, but setting them up can be heavy, because it involves a lot of shell commands I don’t use regularly, so I have to look for all the steps, a really boring task but then I thought why not to put them together.
The first thing you should do, before creating keys, is to set your user name and email address into your Git identity. This is important because every Git commit uses this information, and its immutably baked into the commits you start creating:
$ git config --global user.name "John Doe"
$ git config --global user.email johndoe@example.com
Warning: this data is “very importante”, we’ll need it later on to use them when you validate your email account with GitHub, and supply them in the following steps.
Ok, with this out of the way, now open your terminal and the first thing we are going to do is to check if existing SSH keys are present, for that we need to lists the files in your .ssh directory, if they exist:
$ ls -al ~/.ssh
By default, the filenames of the public keys are one of the following:
- id_dsa.pub
- id_ecdsa.pub
- id_ed25519.pub
- id_rsa.pub
If the command shows an empty list, that means we have to create a new pair. For that we must run the following command in our terminal:
$ ssh-keygen -t rsa -b 4096 -C "your_email@example.com"
When prompted, I recommend selecting the default options, so just press intro. And don’t forget to use a good password for your key. All of this process creates a new ssh key pair, using the provided email as a label and the best encoding available today. Now we are only missing to add the new pair of keys to the ssh-agent, first we need to run it in the background (just this first time in case it doesn’t run automatically) using the command:
$ eval "$(ssh-agent -s)"
This throws the agent PID, which shows It is working, and now, given than you used this as your name and location for your key pair, we can run the following command:
$ ssh-add ~/.ssh/id_rsa
Now we just need to add our keys to our code repository -I assume GitHub, but if not, using other is not that difficult- so in the future we don’t need to go through the usual HTTP authentication process every time. To add the keys to our GitHub account we need to copy the content of the public key to our profile, for that run the following code:
$ cat ~/.ssh/id_rsa.pub
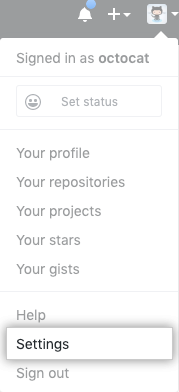
Given than you used default values in the previous step, this prints the content of the file in your terminal, copy it to your clipboard. Now go to the settings screen in your GitHub account.
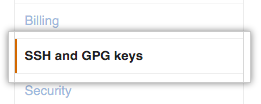

Select the tab SSH and GPG keys and fill the fields with descriptive data (so you’ll know what you are looking at after a year), and add your new SSH key to the account. With this out of the way, now we can create the GPG keys using the GPG tool; if you don’t have them you can download the GPG command line tools from here GnuPG’s Download page.
First let’s check the list of existing GPG keys for which you have both a public and private key:
$ gpg --list-secret-keys --keyid-format LONG
If there are no GPG key pairs or you don’t want to use any that are available for signing commits and tags, you’ll need to generate a new GPG key. But if there’s an existing GPG key pair and you want to use it to sign commits and tags, then just will need to add your GPG key to your GitHub account and let know your local Git about it.
To generate a new key, let’s run the following command and keep in mind the following considerations:
$ gpg --full-generate-key
- For the type of key you want I recommend to press Enter to accept the default RSA and RSA.
- For the key size, assign the maximum key size of 4096.
- Unless you have a specific need, press Enter to indicate that the key doesn’t expire.
Verify that your selections are correct. - When asked to enter your email address, use the one you verified for your GitHub account.
- Always use a secure passphrase, as you should.
Now we have our brand-new pair of GPG keys, we have to do two things: we need to tell Git about them, so we can start signing our commits, and then we need to tell GitHub -or your provider of choice for that matter- about your key, so they can validate the commits.
First we call the keys using the following command:
$ gpg --list-secret-keys --keyid-format LONG
Now copy the GPG key ID you’d like to use. In this example, the GPG key ID is 3AA5C34371567BD2 andit should throw something of likes of:
/Users/hubot/.gnupg/secring.gpg
sec   4096R/3AA5C34371567BD2 2016-03-10 [expires: 2017-03-10]
uid                          Hubot
ssb   4096R/42B317FD4BA89E7A 2016-03-10
Now let’s run the following command, substituting in the GPG key ID you’d like to use from your list:
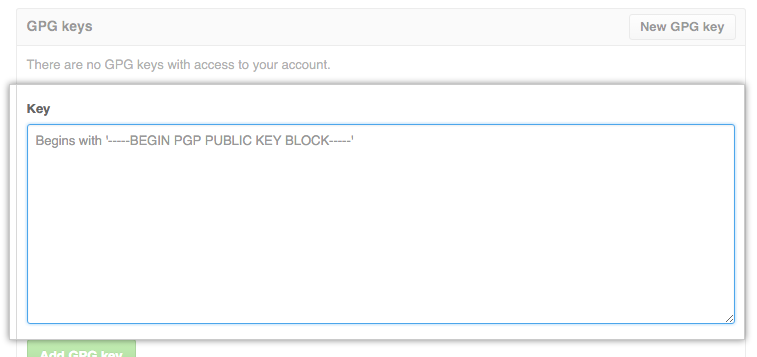
$ gpg --armor --export 3AA5C34371567BD2
This command prints the GPG key in ASCII armor format, you just need to copy your GPG key, beginning with —–BEGIN PGP PUBLIC KEY BLOCK—– and ending with —–END PGP PUBLIC KEY BLOCK—–. For this we just need to repeat the steps we went through to add the SSH keys, just this time we’ll use the section below for the GPG key, and in the “Key” field, we paste our GPG key previously copied from the terminal
Et voila, you told GitHub about your GPG keys and SSH keys, and now we just need to tell Git about our GPG key, for this we repeat the command to list our keys:
$ gpg --list-secret-keys --keyid-format LONG
That should show us something like this:
/Users/hubot/.gnupg/secring.gpg
------------------------------------
sec   4096R/3AA5C34371567BD2 2016-03-10 [expires: 2017-03-10]
uid                          Hubot
ssb   4096R/42B317FD4BA89E7A 2016-03-10
And then we can run the following command, substituting in the GPG key ID we want to use:
$ git config --global user.signingkey 3AA5C34371567BD2
And now Git knows about our keys too because you, dear developer, just assigned it to your Git identity, and it is in sync with your remote account (GitHub in my examples, but it should be fairly easy to do with other services like BitBucket and GitLab).
But wait, why should people sign their commits? Just because some random dude (a really handsome and clever one if you let me point it out) on the internet said so? The answer is no, we should sign our commits because when I as a developer sign a Git commit, you can prove that you were the one who submitted a piece of code, and than that snippet wasn’t altered on transfer. Keep in mind than this is not about witch hunts and developer sharpening their pitch forks -actually, can those be sharpened?- looking for someone to blame for bugs (but you can certainly do that too if you wish).
Developers of the world, signing Git commits is important in this age of malicious code and back doors, it helps protect you from an attacker who might otherwise inject malicious code into your codebase. It also helps discourage untrustworthy developers from adding their own back doors to the code, because once it’s discovered, the bad code will be traced to them.